[et_pb_section fullwidth=”off” background_color=”#000000″ inner_shadow=”off” parallax=”off” background_image=”http://www.blackholelab-soft-lithography.com/wp-content/uploads/2014/04/blackholelab-black-soft-lithography-PDMS-copie.jpg”][et_pb_row][et_pb_column type=”2_3″][et_pb_text admin_label=”Text” background_layout=”dark” text_orientation=”left”]
SU-8 photolithography : Hot plates
How to choose the right photolithography hot plate for your SU-8 microfluidic mold?
[/et_pb_text][/et_pb_column][et_pb_column type=”1_3″][/et_pb_column][/et_pb_row][/et_pb_section][et_pb_section][et_pb_row][et_pb_column type=”2_3″][et_pb_text admin_label=”Text” background_layout=”light” text_orientation=”left”]
![]() It exists two kind of equipment commonly used in laboratory to bake SU-8 photoresist for the fabrication of your microfluidic mold : ovens or hot plates. Note that advice given here for SU-8 photoresist baking remain also relevant for other types of photoresist involved in the fabrication of microfluidic mold (like AZ9260). The SU-8 pre-baking step is a critical photolithography step since it enable the evaporation of the SU-8 photoresist solvents enough to harden the photoresist (A fraction of 7% of solvent is a good value to succeed the exposure). and during soft-back it make possible a good cross link after exposure.
It exists two kind of equipment commonly used in laboratory to bake SU-8 photoresist for the fabrication of your microfluidic mold : ovens or hot plates. Note that advice given here for SU-8 photoresist baking remain also relevant for other types of photoresist involved in the fabrication of microfluidic mold (like AZ9260). The SU-8 pre-baking step is a critical photolithography step since it enable the evaporation of the SU-8 photoresist solvents enough to harden the photoresist (A fraction of 7% of solvent is a good value to succeed the exposure). and during soft-back it make possible a good cross link after exposure.
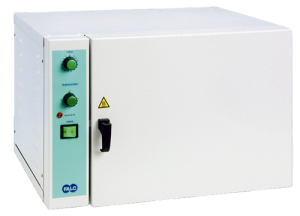 Ovens heat the air around the wafer and so the S-8 photoresist is heated from the outside to the center, this scheme doesn’t help for the solvent evaporation. What’s more, even if it’s possible to bake several wafer in the same time, the temperature is not really uniform depends on the wafer and their position inside the oven. Once you know the importance of this step, it seems obvious to not use an oven to bake your SU-8 photoresist to fabricate your microfluidic mold.
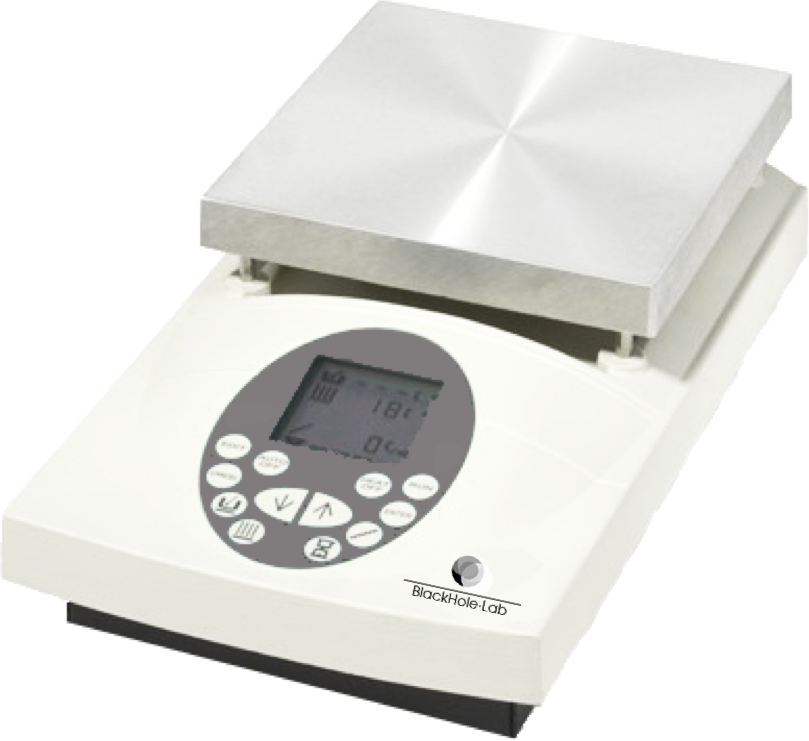 The hot plate can heat only one wafer at a time, however it heats from the back to the top. The heat goes up and so promotes the solvent evaporation. This equipment offer different options and some are better than other but the hot plate is the best heating tool to bake SU-8 photoresist when you want to fabricate a microfluidic mold. For this reason we will focus this tutorial on hot plate only.
What must be taken into account when buying a photolithography hot plate for SU-8 baking?
During your SU-8 photolithography process, hot plate aim is to heat your photoresist. But the way to get it can be different according to all the equipment, each offer different options, some deeply needed and other just to make your life simpler.
Real temperature display of photolithography hot plate surface
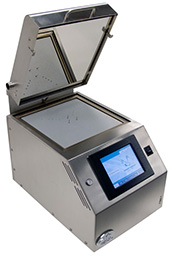
One important point is to check if the real temperature is the same that the set point temperature wanted. So to ensure a controlled baking of your SU-8 photoresist give priority to hot plates which display in real time the measured temperature. We noticed that some photolithography hot plate have temperature sensor which drift overtime. Since this temperature drift could downgrade the reproducibility of your process, check the sensors technology of your hot plate. If you are not sure of the temperature drift of your hot plate over time, ideally a monthly scheduled infrared check of the real surface temperature of your hot plate would ensure you reproducible SU-8 photolithography process.
Overshoot and stabilization time of your photolithography hot plate
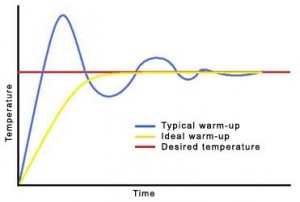 When you set a new temperature and according the regulation mode (PID values) the temperature of your hot plate can exceed the set point before to stabilize. This overshoot depends on the gap between the hot plate temperature and the set point. This overshoot can reach several degree and strongly downgrade some of your SU-8 process. Ask about the temperature overshoot of your hot plate before buying it. If you cannot get the information, we advice you to measure this overshoot with a simple pyrometer for usual set points ( and to check also the stabilization time) . Even it is often difficult to know the real stabilization time and temperature overshoot of your your hot plate before buying it , those parameters remain important to have a good and repeatable Su-8 photolithography process.
Temperature homogeneity on the whole photolithography hot plate
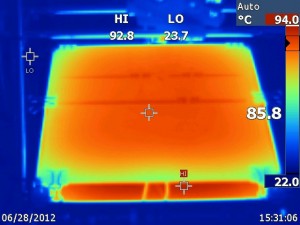 It is rare that the temperature of an hot plate remain the same on the whole plate. The center is usually at the set point temperature and the temperature decrease when going to the edges of few degrees. You need to know or measure this non homogeneity to be sure to have an enough homogeneous wide space to put your wafer. Here too, even it is often difficult to know the real homogeneity of your your hot plate before buying it , this parameters remain important to have a good and repeatable SU-8 photolithography process. If you cannot be sure of the temperature homogeneity of your hot plate befre buying it we recommend to use a pyrometer or IR-camera to check temperature homogeneity over the hot plate when you receive it.
Photolithography hot plate composition
You will find generally two kind of material for your photolithography hot plate, the ceramic or the aluminum.![]()
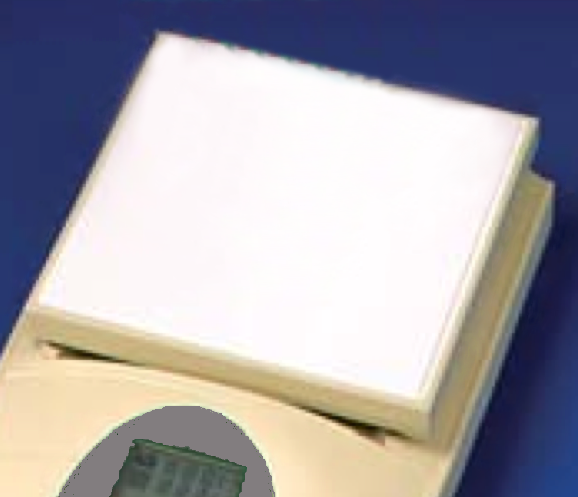 The ceramic plate make possible to heat at high temperature (>450°C). It is really resistant to a large range of solvent and chemicals products and what’s more is easily cleanable. But because of its thermal conductivity quite weak, the temperature will not be really homogeneous on the whole surface.
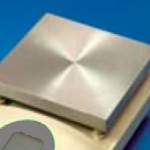 The aluminum plate cannot be heated at the temperature as high as ceramic and is less resistant against solvents and chemical products (NaOH for example). In contrast, thanks to its high thermal conductivity, the temperature is more homogeneous on the whole plate surface than with the ceramic one. For SU-8 photoresist processing, you have to give priority to the homogeneity and so the aluminum plate appears as the best choice.
Possibility to do temperature ramp for gentle SU-8 baking
The possibility to increase and/or decrease slightly the temperature is important in Su-8 photolithography process. Indeed, the SU-8 photoresist become really tight during the bakes. To decrease the mechanic stresses on your SU-8 film, it’s relevant to decrease and increase the temperature slightly. To increase or decrease the temperature it is possible to do ramps “by hand” regularly change the hot plate set point. However this solution it is really constraining and not reproducible. Some photolithography hot plate offers to heat and cool down at different rate. Usually for the decrease, it is only possible to slow down by natural cooling because be able to effectively decrease the temperature impose to have an azote line and a more complicated control. It’s difficult to control the cool down but generally a natural cool down allow a slowly decrease enough for the fabrication of optimal SU-8 molds for microfluidic applications.
Photolithography ot plate with automatic timer
 The bake steps have to be done during a precise time; the possibility to have an intern timer to warn the user at the end of each step without using an external timer is little a practical advantage. Some equipment offers the possibility to automatically stop the heat at the end of the pre-set time. We often recommend this kind of option since it enable inattention mistakes when processing several wafer in parallel for example. Moreover it allows the researcher to not be dependent on the time of the step and doesn’t have to stay close the hot plate during the SU-8 mold baking.
Program photolithography steps
The baking processes of your SU-8 microfluidic mold often have several steps with different stage at different temperature. Be able to save those temperatures steps and even the different ramps will make your life simpler and enable you to get reproducible and high quality photolithography process.
Temperature increment size and precision of your photolithography hot plate
Generally and depends on the equipment, the increment is by 5°C or by 1°C. Beware that the temperature precision is directly rely to this. To bake your SU8 photoresist strongly prefer an increment by 1°C. Almost all photolithography hot-plate provide 1°C temperature precision so it should not be a problem when buying the hotplate.
Safety and user protection
Most of the equipment offers a warning light when the plate is over a particular temperature (often 50 °C). This option alerts other users on the dangerousness of the device. Nevertheless, be careful, this light switches off with the device so check to put a warning pictogram and make the other users sensitive to the danger. We do not insist on this point since it do not enter into account on the quality of your final microfluidic mold.
Photolithography hot plate size
 It exist different kind and size of photolithography hot plates, choose one, which will stick the best to your application. A too big plate will occur a great inertia during the temperature decrease. To ensure a good SU-8 photolithography process choose a plate a little bit bigger than the silicon wafer to heat to be free from the edge effects that makes the temperature cooler on the edges than on the center. For a inch wafer (diameter of 10cm) you can use an 18 by 18 cm photolithography hot plate.
Horizontality of your photolithography hot plate
Before the solvents are evaporated, the resin remains quite liquid, so you have to be sure that your hot plate is perfectly horizontal to prevent any in-homogeneity in the depth of the layer. Use a spirit level to adjust your hot plate. We recommend adjustable photolithography hot plate.
Easy cleaning of the photolithography hot plate
It is really important to keep the plate clean because the photoresist which can remains on the surface has a bad thermal conductivity and will deteriorated the reproducibility of your next photolithography process. Be sure your hot plate will be easily cleanable since a dirty hot plate can be a reason of bad reproducibility of your SU-8 process.
[/et_pb_text][/et_pb_column][et_pb_column type=”1_3″][et_pb_sidebar admin_label=”Sidebar” orientation=”right” area=”et_pb_widget_area_24″ background_layout=”light” /][et_pb_sidebar admin_label=”Sidebar” orientation=”right” area=”et_pb_widget_area_11″ background_layout=”light” /][et_pb_sidebar admin_label=”Sidebar” orientation=”right” area=”et_pb_widget_area_22″ background_layout=”light” /][et_pb_sidebar admin_label=”Sidebar” orientation=”right” area=”et_pb_widget_area_16″ background_layout=”light” /][et_pb_sidebar admin_label=”Sidebar” orientation=”right” area=”et_pb_widget_area_12″ background_layout=”light” /][/et_pb_column][/et_pb_row][/et_pb_section][et_pb_section background_color=”#f7eaff” inner_shadow=”off” parallax=”on” background_image=”http://www.blackholelab-soft-lithography.com/wp-content/uploads/2014/04/contact-PDMS-chip-microfluidic-background-2.jpg”][et_pb_row][et_pb_column type=”4_4″][et_pb_text admin_label=”Template contact” background_layout=”light” text_orientation=”center”]
[/et_pb_text][/et_pb_column][/et_pb_row][/et_pb_section]


